Friday, January 29, 2016

Too many things we finished to put in the title.....

Hey everyone!!!

We have lot's of pictures to show you all... and we're super excited about everything that we've finished in the last couple of weeks! Why? Because we are that much closer to completing this thing and living in it!

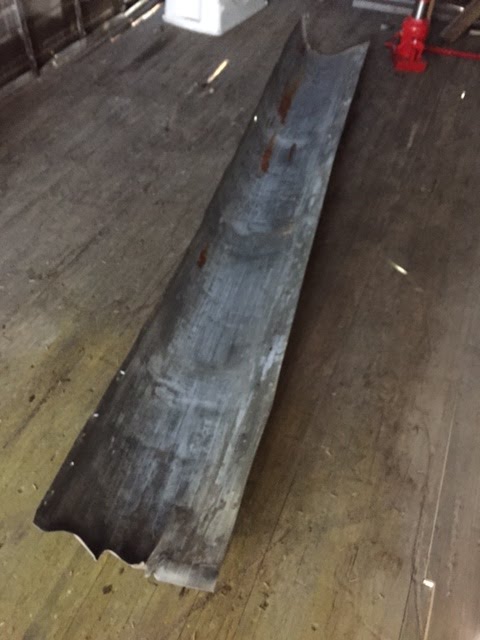
First thing we (and when I say we, I mean Travis did 99.9% of it all and I did the rest) did was remove all the wood on the floor


This is what he did....


It was no easy task, ripping out all of the wood.  They were some how screwed into the metal beams... And the only way we could remove them was with a sledge hammer.... Now before anybody says anything, we did not lose an eye, finger, or a limb in the process, I think that's quite an accomplishment!


(This is Travis removing the last piece of the floor board!)
I owe him an eternity of back massages. 


After removing all the wood, I had the pleasure of power washing the walls... Call me crazy for doing it in the dead of winter BUT it had to be done! I wouldn't of let Travis continue if I didn't get that metal clean! 


Now there's still some dirt on the walls but it looks ten times better than it did.... I would of took a before-and-after picture but I'm not going to subject you guys to that grossness....

After power washing, Travis cut off every screw on the metal beams..... And it was a lot easier than ripping out the floor that's for sure....


We can officially say demolition is DONE!! (I'm not counting cutting the roof and the metal where the door and windows are going)


The next thing we have to do is cut off the nails on the walls... and then get wood for the sub flooring and then start building the frame and cut the roof!!

Everything is really coming together! Pretty soon you won't even be able to tell it's a trailer!


Lastly I want to say thank you to my man and that I really appreciate you!  We wouldn't be doing any of this if it wasn't for your devotion and your motivation to work on the trailer! I love you! 

Saturday, January 23, 2016

If you're squeamish or sensitive... read this with caution


The happy couple :)

We're happy to report that we've made some significant progress in this crazy adventure. We've also made some unfortunate discoveries....

First off, the roof has been repaired by none other than Travis!

                                            
The photo might be a little confusing but what we're looking at is the roof repair I made. The bottom of the photo is the wall, so we're looking up onto the roof. It may not look amazing, but for a first-timer with mediocre tools I'd say it's pretty good! Obviously this won't be visible once we're done building. Insulation and dry wall will cover this all up.

The next step is working on the floor. We need to tear it up and wash the inside of the trailer, it smells kinda strange. We think we figured out why... there wasn't any dead bodies in it (although we did find dead birds :( and there was rotting wood).


Yes, that's a bird egg. The nest we found there was quite big, but was long abandoned.

Fortunately, I have a very proactive girlfriend and she wanted to get some serious stuff done, so we started on the floor and almost got to where we need to be!


What we're looking at here is the main frame of the trailer. There's a big piece of metal there in the metal to connect the trailer to a semi-truck via something called the "kingpin". 

You can also see where our tree trunks are touching the trailer. That piece of metal is probably the strongest part of the whole trailer, so we don't fear it bending, breaking or failing on us.


What we need to do now is clear the floor about halfway, then get a power washer and wait for a warm day (like today and yesterday). Once a warm day approaches we'll come back, clear the entire trailer, tear up the floor in the early morning, then power wash that monster!

When we're done power washing it, we'll need to prep the sub-floor so we can still walk on it and begin drawing on the windows and doors, cutting the metal, then slowly but surely building the interior wood frame. Exciting times!!! Stay tuned!

Wednesday, January 13, 2016

Sometimes a window can make you smile


Hello family and friends! We've got some exciting news...! Our windows have finally been bought (all but 1)!!!


"Travis! Look! They have windows!"


"OK, now put them in the cart. Let me take a picture."


"I don't think they'll all fit in that shopping cart..."


"Wait... where are we gonna put these?!?"

Hey guys! It's been a moment since I've posted something but I'm so excited!!!! Today we went to Habitat for Humanity to buy our windows and door.  We looked through all the doors and nothing stuck out to us, but we got 5 out of 6 windows.... 

I'm really happy and excited because that means we can finally get to cutting the metal. 


Wednesday, January 6, 2016

Roof Repair

Thanks again for joining us on the $10K Tiny House challenge!

This has been quite a productive year so far, despite some minor set-backs.

What we've accomplished;

1. Foundation is secure
2. Old interior wood has been removed
3. Tools, materials, etc. have all been collected and are ready to be used

Recently, we've been able to repair some minor roof damage left by the previous owners. Photos are below


As you can see, the material we bought a while back from Home Depot was used and was very easy to apply. It dried in about 2-3hrs, and fully cures in about 48hrs. These holes were, again, very minor.

On the front corner of the roof was a nasty dent/hole made by what looks like a minor accident. Therefore, I had to cut out the dent and mangled metal, and will have to install a new sheet of metal securely onto that corner before we move onto painting/coating the roof one last time.


Because Kiah and myself are definitely in the business of reusing and recycling, we decided that we're gonna use some scrap metal found inside the trailer itself.


Yes, it looks small on camera, but it's more than enough metal to make that repair properly. We'll obviously have to flatten it out first, then secure it using several self-tapping screws, chalk, and some of that white sealant.


Thanks for reading! :)