Saturday, November 28, 2015

Why you no post long time?!?

Hey everyone!

Sorry for the lack of posting, winter has kind of stalled our project (like we expected).

For those of you looking for an update, we just bought our fire place, and it's the Cubic Mini Wood stove we talked about getting.  This bugger is small but packs a punch (say the people who bought it). It's capable of heating an RV, boat, etc. up to 40 feet long. Yep, that's 40 large ones! Our humble abode is just 25 feet long, I think we'll be ok. Especially with the type of insulation we are planning to install in the ceiling. 
It even has the metal shielding like the one photographed here :) It should arrive within 3-4 weeks, and when it does, we'll test it out and be sure to make a video of our review. For those of you interested in reading more about this stove (or seeing the reviews I mentioned), check out the link here.

One thing I wanted to mention about our experience so far with the fire place and the company we bought it from is that we attempted to contact the sellers twice within a week and a half time period and didn't hear anything from them. Once we get the product, we'll send an official review letting them know of this initial frustration. 

I (Travis) am the kind of person who likes to get a sense of a company before buying from them (if possible). The reason I didn't wait until they responded is because they had a black Friday deal on the fireplace for 30% off. Anybody who knows me knows I'm a sucker for deals, Kiah knows this all too well. You say "free food" and I'll coming runnin'!


The wood on the inside hasn't gotten completed removed yet (due to cold weather and a lack of knowing how exactly to remove it in the most efficient way. Once we have that removed, we'll move on to cutting the window and ceiling, building the interior wood framing, then putting up the insulation and floors.

Once we have all of that done we could (if we wanted) actually sleep in it! We'd have heating, insulation, and walls! Exciting stuff :) Stay tuned!!

Friday, November 13, 2015

Budget plan (so far)

What a productive week!

This week has been crazy both for Kiah and I, in both our work places and working on the tiny house. I'm glad the weekend is here to get some serious work done.


We are still working on the wood on the inside of the trailer. We got the shelving off, now we just need to get that nasty old wood that is nailed to the metal of the trailer.  Photos will be provided.

Good news is we have enough wood from the shelves to build a ramp to get in and out of the trailer while we build it as well as some heat shielding for the fire-place; did we say we were gonna get a fire-place?!?

One I've had my eye on for quite some time now:


I think it's absolutely perfect for our tiny home. There are specific regulations that everyone should adhere to when installing a fire-place. I hate regulations, but these are one of the few I'll follow to a T.


This is called the Cubic Mini Wood Stove. It's only about $400!! It'll heat RV's up to 40' long, which is much longer than our tiny home :)


Anyways... I finally got to a rough budget plan (several weeks a little late). As you all know, we are shooting for $10,000 maximum. This means we need to save as much money as possible in as many areas as possible. I'm all for saving money in every little nail, but with the rough estimates I've made thus far, the big purchases add up way more than the small ones.


Here is our rough budget plan:
Wood studs: @2.39 a piece (I'm sure we can find cheaper)= $263

Insulation: 
Option 1) with an R value at 13 (higher is better, our region should be 13-26 for walls): $153.45
Option 2) with an R value at 15: $149
Option 3) with an R value at 26 (if we double up on them): $688.48

Ceiling insulation: with an R value at 38: $70

Floor insulation: with an R value at 13: $26.48

Dry wall: $230.58 (we might be able to find cheaper)

Fire place: $400

TOTAL: $1,649. This means if we get anywhere under that number ^^ we'll be doing alright. If we spend about this much, we'll have about $6,896 left to spend on things like solar panels, a fridge, doors, windows, wood flooring, etc.

Sunday, November 8, 2015

Up next...? Nasty old wood... yay!

What's next?

Kiah and I are super excited that we got the foundation finished and are now moving to the interior of the trailer! Yay!!

If you haven't already seen it, check out our earlier posts on the foundation, pretty intense stuff. It took forever. Bleh. I'm glad to be done with it :)


Next we have the inside of the trailer, which looks like this;

We will be posting a before and after series of the inside with and without the wood. The wood covers all of the metal that makes up the shell of the trailer, it's gotta go. It smells funny, it's rotting... we aren't keeping most of it. Although it may seem like a burden, buying the trailer with this wood in it has it's PROS and CONS....

Pros:
-extra wood for other stuff, like; building a ramp, construction of the porch and loft, etc.
-we could use it for firewood

Cons:
-it smells funny
-theres a lot of dust and sand everywhere, when we remove it the dust gets into the air
-there's a lot of it covering most of the inside of the trailer
-most of it is old and not usable for anything structural


We'll see what we can think of once we remove the wood, but for now, we're gonna get that old, nasty stuff out of here! Be sure to check back for a before-and-after comparison!

Saturday, November 7, 2015

Foundation finished!


Hello again all :)


I'm happy to say that Kiah and I have officially finished with the trailer's foundation!! We will be making a small addition to it much later but for now, the photos below depict the primary and secondary foundation support systems.


<< This is the front of the trailer with the two trunks holding it up. The trailer stands up on it's own (without these trunks), but the trunks add obvious support for the front of the trailer. The sit right under the main part of the frame.

The photo below is just a wider view of the front of the trailer.


^^ These next two photos are of the back of the trailer, with two smaller trunks holding up the axle and the main weight of the entire trailer. 

You can't see with these photos, but the tries closest to the camera are off the ground whereas the ones further away are not. The reason for this is because of the slant in the ground. The two trunks under the axle are of different height but the difference wasn't enough to get both sets of tires off the ground.

I'm actually more comfortable with this set-up, rather than having both sets of tires off the ground. This adds some stability but also ensures us that if the tires end up deflating somehow, the entire tire won't become unleveled again.

We'll eventually have to get under the trailer and WD-40 everything to get it read for winter, but this is what we have so far! Thanks for reading :)


Saturday, October 31, 2015

Leveling the trailer!

Hello again everyone!

Kiah and I have been working our weekends hard to finally get the trailer of our tiny house leveled, it took a lot of work!

I would say for those of you attempting to build a tiny house yourself, prepare yourself to spend a good 4 days leveling it. With our level of expertise and equipment, it took longer than what many with experience may find.

Anyways, you all know that we are trying to keep the house under $10K so we decided to recycle fallen trees for some additional support. Personally, I'd rather have the support be overkill rather than under. 


We have the landing gear, two tree trunks that I cut with my step dad and placed into 2.5 foot holes, and the axle with the 4 tires. We will also be building a small deck/porch which will add support to the whole thing. The video below isn't too exciting, nonetheless, it shows some of the work involved with leveling a big trailer like this one.


**A side note on equipment, we've been able to borrow most of the equipment that we've used so far from friends and family. We haven't broken any of them (thank god) and plan to return all of the tools once we are done. Kiah and I have a strict policy that if we break any of the tools we will replace them right away with a new one. What we have bought is the 30K jack, which I priced on an earlier post.

Saturday, October 24, 2015

First Design Ideas

Hello Fellow Tiny House Lovers!


Today we're posting something a little bit different than our previous posts.  This post will be about design. The reason being, we're still in the process of leveling the trailer.  I want to share with you guys some ideas of what I want our tiny house to look like, mainly on the inside.  
The first design aspect that Travis and I have agreed on is that for our floor we want a light colored wood and then with dark stained or cherry wood accents. There's a lot of images on Google and this is the best one I found.  


Most of the pictures I've seen there's an equal amount of light colored wood and dark colored wood.  But I prefer to have more of the light colored wood than dark.  The reason being is because I want to keep our space as bright as possible but still be able to add some color or dimension to our house.

Next we also what to do a similar affect to the ceiling.  Here's a picture of what we want exactly.


The picture shown above, is actually the house that I draw a lot of inspiration from.  Here's the link to see the full house. 
http://tinyhouseblog.com/stick-built/university/

If you check out this house.  I love the stairs and the placement of the refrigerator.  I also love the wood ceiling in the bathroom and kitchen.  I also love the table/booth and the big window next to it.  We've designed our tiny house to have this table/booth and big window.  Check out our previous post of our "blue print" and you'll see where we placed everything.

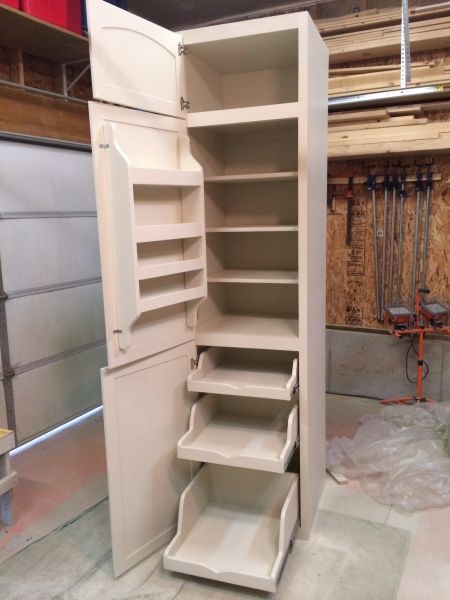
Now for our clothes, I first had the idea of having a little side door next to our bed in the loft floor.  I then realized that I didn't want to grab my clothes from the loft and bring them down stairs to change or change in the loft, which would be super cramped.  So I came up with the idea of having a his and her closet right next to the bathroom.  This way we can have our clothes down stairs and be able to get dressed in the bathroom, which we'll have more room than maybe changing up in the loft or carrying our clothes all around our house. I found a picture that gave me the idea for the closet. I do like the compartments in the picture below, but I have a slightly different image in my head.


I really like the drawers on the bottom that come out, for shoes.  But the middle section I want to be able to hang clothes, like dresses or Travis' fancy work clothes. But our closets will have doors on them.  At first I was thinking of curtains but I like the idea of having doors more because it looks more organized and cleaner.  

Second to last I want to mention my crazy love for copper/ rose gold accents.  I want cooper accents threw out the whole house. Especially in the kitchen.  Travis and I decided that we want a copper sink.  Our sink will obviously not be as big as the one in the picture below.  But I love the idea of the cutting board fitting over the sink, because that saves a lot of room and you can use the sink for multiple purposes. (That's why I chose this picture)  We've also decided not to have a bathroom sink.  Our kitchen sink will act as our bathroom sink.  This decision may obviously change when we get closer to assembling the inside of the house.


Lastly, the only vision I have for the kitchen right now is hanging my tea cups from the bottom of the cabinets or a shelf.  I love tea and tea cups and I have an assortment of them and I would love to be able to display them and it also have functionality.  I'm not sure if I want to screw hooks into the bottom of the cabinets or have a long copper rod with hooks.  But I'm sure that this decision/ design will be made when I'm actually ready to hang my tea cups ;)


So for right now,  these are our ideas on what we want.  Obviously these ideas and decisions may change but when I envision what the inside of our house will look like, these are the things that stick out the most to me. 

I also have a Pinterest that I've pinned some tiny house ideas that I love so here's the link to my Pinterest if you're interested: https://www.pinterest.com/happyhappys11/tiny-houses/ 

I'm not sure how or if any of these things will match and flow but like I've said before, I want this house to feel like a home.  And homes are not meant to be perfect.  They're meant to look like someone lives in it.  It gives off personality and character of the people that live in them. 

Side note, that's why I loved going trick or treating.  For a brief moment I got to see inside peoples homes and see a glimpse of their lives and what they may cherish and value the most.  I enjoy that a lot.  

Anyway, I love every idea that Travis and I have come up with so far.  We would love to do all of our ideas, but in the end we have to narrow it down.  

I hope that everyone enjoyed this post and I promise there will be more posts like this, even when we're building and constructing the main structure of the house. This last thought is mainly for myself but I know there will be times that I may get stressed and loose sight of what we're doing, but having posts like these, will help remind me and give me a purpose to see this crazy adventure to the end.  Til next time.....


HAPPY TINY HOUSE ADVENTURES!


Tuesday, October 13, 2015

The trailer is leveled!!! Just kidding... :(

Hello Everyone!

We have officially hit our first road-block.

While Kiah and I were lifting the trailer with our 30-ton jack (which worked fabulously), we put the cinder blocks underneath the axle and it all worked out fine until we began lifting the landing gear. The weight transferred to the axle and sliced through the cinder blocks like bread.

Now we are in thinking mode.


We need something that will hold the weight of the trailer (20Klbs.+), and the pressure of the 30-ton jack. The concrete blocks we bought were rated for about 2000lbs of psi, we need a lot more than that.


We've looked up material with high PSI and found that certain types of wood can hold much more PSI than the cinder blocks. We'll test that and see. 

So far, we've designed a way to test the material to see if it can hold the weight so it doesn't put either of us in danger.


If any of you have any legit recommendations, please let us know!